There are four genuinely different ways to make an anime explosion in Blender, and most tutorials teach one without mentioning the others exist. Picking the wrong one costs you days.
Here is what each actually suits.
1. Smoke Simulation With a Toon Shader
The intuitive approach, and usually the wrong one.
You run Blender’s smoke simulation, then apply cel shading to the volume. It sounds like it should work. It rarely does, because simulation produces soft volumetric gradients and anime smoke has hard, deliberate edges. Quantising a soft gradient gives you banded mush, not shapes.
Simulation also gives you one physically plausible result. You can tune parameters, but you cannot say “that plume should be a hooked claw shape” — which is exactly what an effects animator would decide.
Use it when: you want semi-realistic stylisation rather than true anime. Avoid when: you need specific shapes.
2. Procedural With Geometry Nodes
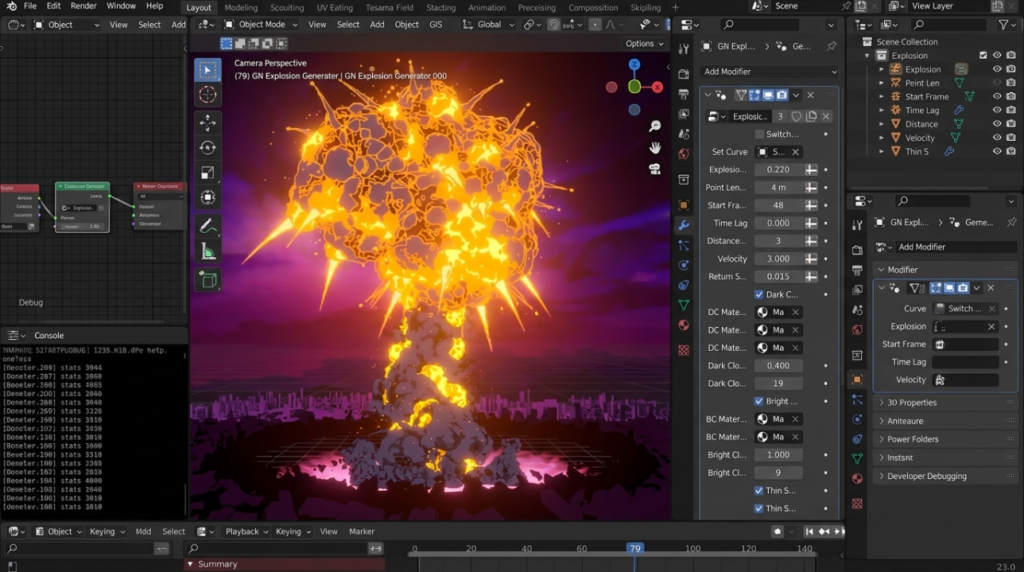
The approach behind most of the impressive work you have seen, including Hiroshi Kanazawa’s explosions.
Instead of simulating, you build the effect from instanced shapes and drive their growth, timing and layering with nodes. The core mass, outline, debris and flash become separate elements you control independently.
That control is the entire point. Hand-drawn effects animation works the same way — the animator draws the shape they need, not the shape physics would produce.
It is also reusable. A well-built setup becomes a tool you apply repeatedly, which a baked simulation never does.
Use it when: you need art direction, repeatability, or more than one explosion. Cost: the steepest learning curve of the four.
3. Grease Pencil and 2D Compositing
The honest option nobody mentions: draw it.
Blender’s Grease Pencil works in 3D space, so hand-drawn effects can sit correctly within your scene, occlude properly and follow a camera move.
For a single hero moment, this is frequently the fastest route to the best result — because you are doing the thing anime actually does rather than approximating it. Plenty of production work layers drawn effects over 3D for exactly this reason.
Use it when: one or two hero shots, and you can draw. Avoid when: you need fifty explosions.
4. Buy an Effects Pack
Ready-made anime smoke and explosion assets exist, sold by artists who specialise in them.
There is no shame in this. If explosions are set dressing rather than your project’s selling point, a pack costs less than the days you would spend learning procedural VFX — and the result will likely be better.
Use it when: effects are not the hero element. Watch for: licence terms if you are shipping commercially, and whether the pack matches your project’s specific art style, since stylised assets are far less interchangeable than realistic ones.
Which Should You Actually Pick?
- One shot, you can draw → Grease Pencil
- One shot, you cannot draw → buy a pack
- Many shots, ongoing project → Geometry Nodes, and accept the learning curve
- Semi-realistic stylisation → simulation with careful shading
The Thing All Four Share
None of them will look right if the timing is wrong.
Anime effects hold a shape for two or three frames, snap, then hold again. 3D interpolates smoothly by default, so everything drifts toward constant motion — and constant motion reads as CG regardless of which method produced the shapes.
Animate on 2s or 3s, use constant interpolation where you want holds, and resist smoothing every curve. That single change does more than switching methods.
Getting the Shading Right
Whichever route you take, the shading fundamentals are the same — limited value range, hue-shifted shadows, hard ramp stops and controlled normals. Our guide to clean anime and toon shading in Blender covers the setup, and our Geometry Nodes roundup lists free procedural VFX setups worth studying.